Taupe Smokey Eye Make-up with NAKED 2 Palette – Glam Radar
by Maria · August 13, 2014
Cheers to the weekend, and to a new TUTORIAL! How long has it been since I’ve done a tutorial on my blog?
I was thinking about the fact that I pretty much have only been doing hauls and a few reviews, and I want to really amp up my blog. So, without further a due, enjoy the blog-torial 🙂
All products will be listed in the descriptions!
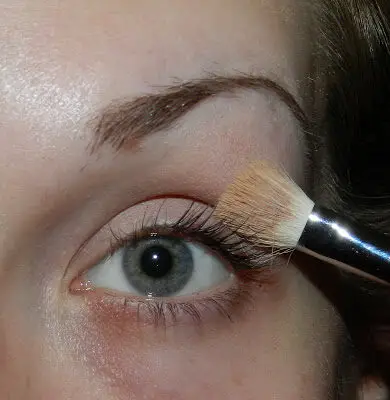 With a Sigma E25 brush, I am going to first apply my MAC Paint Pot in Painterly. Painterly primes the eyelid and prepares it for applying shadow.
I chose Painterly instead of a taupe base because I want the look to be a little more daytime appropriate.
I use a brush to apply my primer instead of my finger to save the “tugging” on my lid.
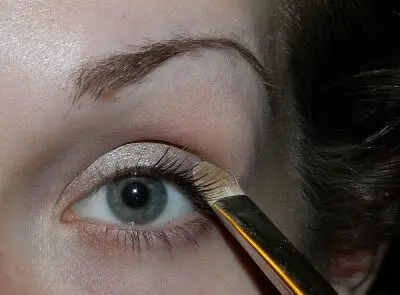 Next, with my MAC 239 brush (which is just a flat shader brush), I am going to pack “Verve” from the Naked 2 Palette all over my lid. This is a gorgeous shimmering silver/taupe. It is one of my favorite shades from the palette!
 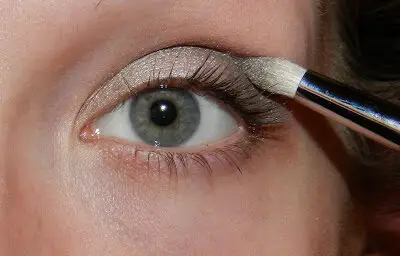 With my Sigma E30, a dense pencil brush, I am going to apply “Pistol” from Naked 2, into my outer V and into my crease.
I love applying my crease color with a pencil brush because it allows me to gain better control of the color and to apply it exactly where I want it to be.
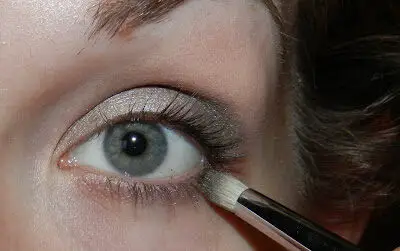
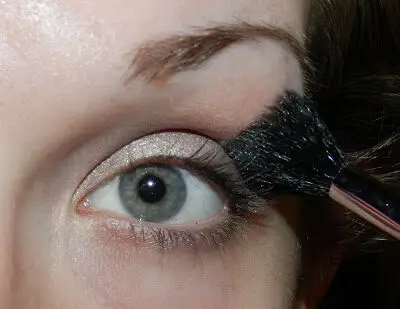 With my Sigma E40 blending brush, I am taking “Tease” from Naked 2, and blending that into my crease and up almost onto my brow bone.
“Tease” is a midtone brown, similar to a skin-tone shade that allows a better blend between the darker taupes and the highlight shade that I will be putting on my brow.
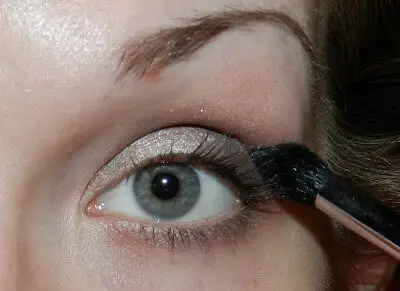 With a small pointed brush, I am taking “Busted” from Naked 2 and lightly applying that into the very outer V of my eyelid. This darkens the look a little bit and adds a bit of depth to the eye.
If you want this look to be very light, you can skip this step, and move onto the next!
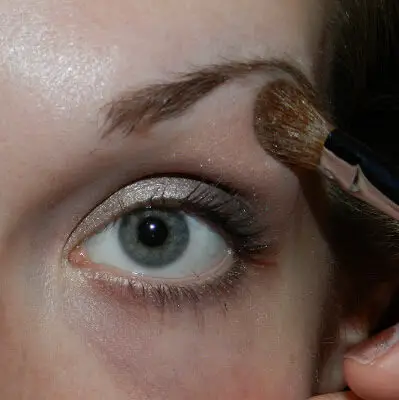 Next, we are going to take this angled shader brush and apply a mixture of “Foxy” and “Booty Call” from Naked 2 onto the brow bone. This is our highlight shade.
The reason I took a mixture between the two colors is because Foxy is matte and Booty Call is very shimmery. Because our look is already shimmery, I wanted to add a slight bit of a frosty highlight, but Booty Call needed to be toned down a bit! Adding a matte shade to the mix did just the trick!
 With our pencil brush again, I am going to take “Pistol” again and sweep that gently on my lower lash line. This again adds a more smokey effect to the look, however you are welcome to skip this step if you are interested in a lighter look.
 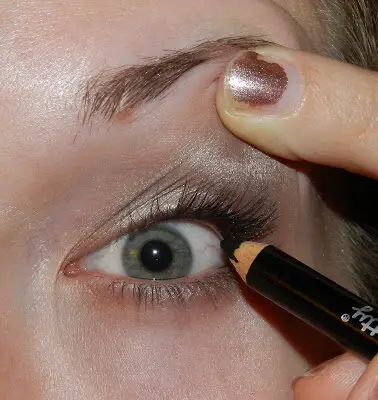 Next part is the harder part for some. I am going to take the matte black liner from Sephora’s Hello Kitty liner set, and apply that to my upper lash line. This is called “Tight Lining”. The easiest way, I’ve found, is to gently pull up your eye lid to reveal your upper lash line, then quickly sweep the liner across. If you are new at this, you might have to do this a couple times to avoid eye irritation. Be careful, and use a steady hand! This trick will make your lashes look more voluminous!
  After we have applied liner to our upper and lower lash lines, I am going to take my Loreal Voluminous Million Lashes Mascara and apply 2-3 coats of that on my upper and lower lashes.
This mascara is great, not my favorite, but I rediscovered it while shopping my stash and decided to use it up before purchasing another. I do love the mascara, but Benefit’s They’re Real will forever hold a place in my heart!
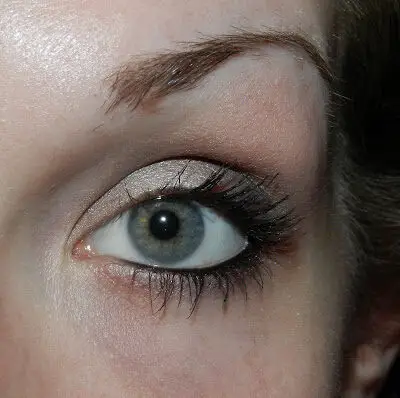 After mascara, we are all finished! This is the finished look!
I hope that you enjoyed this! And let me know future suggestions for tutorials. I had a great time doing this!
Tags: How to do Taupe Smokey Eye MakeupMake up tutorialTaupe Smokey Eye Make-up with NAKED 2 Palette